
This is pretty much a step-by-step process of how to make this hexagon baby bib. It really is a quick and fun way to create something cute for your Little One. I am using Amy's from NanaCompany bib template for this tutorial. There are two reasons for that. Firstly, I really like the particular shape of this bib and it was the original bib I made for my Little One, but unfortunately it got lost. Secondly, for a few reasons we still don't have a printer at home (I know, it's crazy) after our Little One destroyed the old one a few months back. I cannot really design anything at the moment that requires printing or scanning. This shape is really great and suits older babies from about 4-6 months when they need it the most. I have designed a smaller bib of a different shape for my Little One and it was perfect for him while he was a newborn. I might write a tutorial for that later. OK, let's get started.

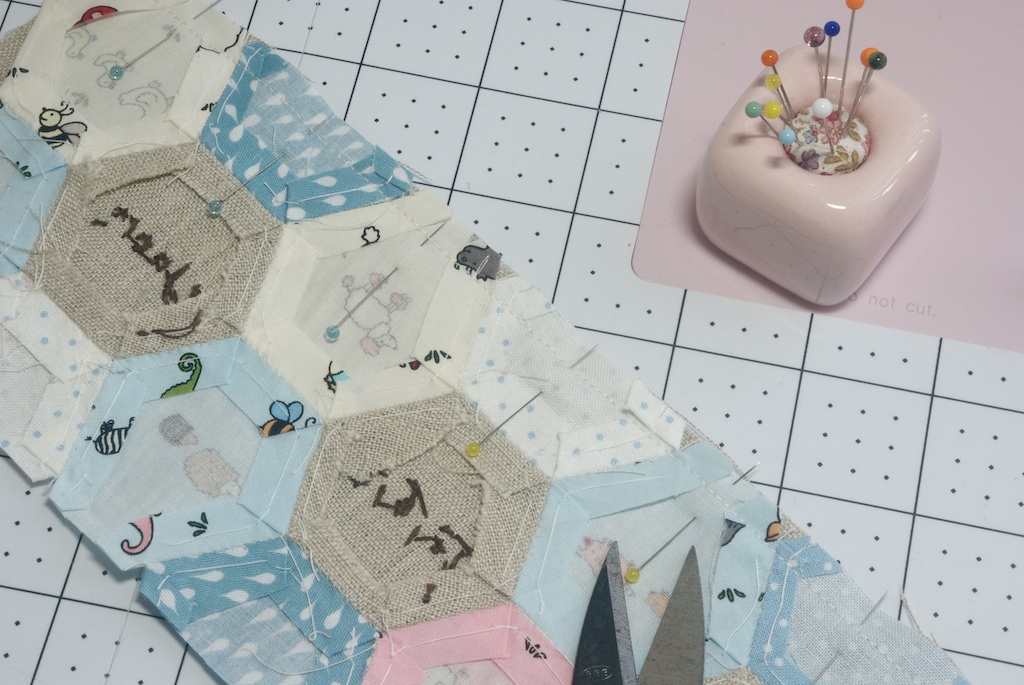
For this bib, as the name and the photo suggest, you will need to make 18 hexagons. They are fun to make and you can get really creative here. Once you have 18 1" hexagons, sew them into a panel, as shown in the photo above.
- 18 (eighteen) 1" hexagons
- embroidery floss or quilting thread
- two pieces of linen for the front 3 1/2" x 11" (bellow the hexagon panel) and 6 3/4" x 11" (above the hexagon panel)
- a piece of cotton for the back 11" x 12"
- a piece of bamboo or cotton batting 11" x 12"
- 1 snap fastener
- NanaComapany Baby Bib template (Thank you, Amy!)
- a cute label or a piece of wool felt, ribbon and button
Step 1: Make the hexagon panel as shown in the photo below using all 18 hexies. Be creative! Use cute prints, bright colours and add some hand embroidery. There are countless possibilities when it comes to hexies. I added three linen hexagons with simple writing done in dark brown embroidery floss.

Step 2: Once ready, remove the papers from the hexagons. I leave the basting thread in because I baste only on the back of my hexagons so it's not visible on the front.

Step 3: Snip the basting thread and unfold only one edge of each hexagon on the top and bottom of the panel. You need to do it only where there are two hexies are joined together. Press well with a hot iron.

Step 4: Trim the panel at the top and bottom to 3 3/4". Note that there are small triangular gaps on the top and bottom of the panel between the hexagons. You will need to stitch right below these gaps. By doing this we will keep the shape of the hexagons perfect.

Step 5: Pin th 3 1/2" x 11" piece of linen to the bottom part of the hexagon panel and sew together.

Pin the 6 3/4" x 11" piece of linen to the top of the panel and sew together. Press the seams towards the linen.

Note that the seam goes under the gap between two hexagons.

Step 6: Place batting on the table and place the back fabric with the right side facing up on top. Place the hexagon panel on top facing the right side down. Pin all three layers together and mark the middle making sure that the three hexagons are well centred.

Step 7: Place the template on top, aligning the centres. Pin in place and trace with a water erasable pen. Mark the opening gap along the bottom part of the bib about 2 1/2" wide.


Step 8: Carefully remove the template, but leave the pins in place. Sew along the traced line going carefully around the curves. Back stitch at the beginning and the end of the opening gap.

Step 9: Trim the excess fabric to about 1/4". Turn the bib the right side out making sure to gently push out all the parts of the bib and stitch the opening closed by hand.


Step 10: Now is the fun part. Get your embroidery or quilting thread and quilt inside the hexagons. I like my stitches to be quite short and the gap between the stitches not too long.

Once you are done, you will end up with quite a textured hexagon panel.

Step 11: Add a running stitch above and below the hexagon panel. Using your machine, stitch all the way around the edges of the bib.

Add a tiny label. Mine is just a piece of wool felt, topped with a piece of a ribbon and a coconut shell button. Oh, I am loving these buttons at the moment!

Install a snap fastener or sew one on and you are done!

This tutorial is just a guide for you to follow and create something new and fun for your Little One or a gift for a special Little Person in your life. If you notice anything that does not make sense, please leave me a comment here so I can fix it up. Thank you and happy sewing! Larisa xox
Thank you for sharing this excellent tutorial. The little bib is adorable.
ReplyDeleteThank you very much for your kind words! Happy sewing!
DeleteI really like your idea of embroidering text on the plain hexagons.
ReplyDeleteIt just add a little special touch to anything really and it's very easy to make. Thank you, Dina! xx
DeleteLove this bib!! Especially the use of hexagons that I have become addicted to hehe . Thankyou for this lovely tutorial
ReplyDeleteCheers
Robyn 🌸
Thank you for your kind words, Robyn! Hexies are very addictive and there is no end to new ideas and new ways to implement them in your sewing. Happy sewing!
Delete