NOTE: When working with wool felt, it is essential to use small sharp scissors and fine sharp needles. This will help you make clean, precise cuts and ensure your felt pieces look neat and tidy.
- Wool felt in white and pink, or any other colours you would like to use
- Small (embroidery) scissors
- Embroidery floss in dark brown and pink
- Quilting cotton or any other sewing thread in matching colours
- Sewing needle
- Soft fill or other stuffing material
- Ribbon or string for hanging
- Optional: small pom-pom for the bunny's tail
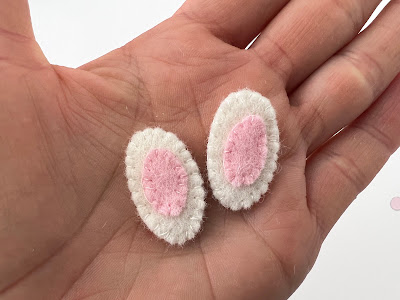
1. Start by cutting out your felt pieces using the template provided. From white felt, cut out the body, feet, paws and face. From pink felt, cut out the inner ears, tummy, inner feet, and tail.
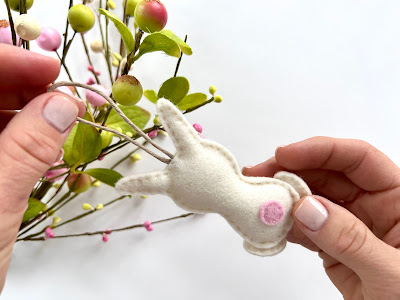
2. To assemble the bunny, use matching pink quilting thread and a fine needle to stitch the inner ears and tummy onto the front part of the body. Then, attach the tail to the back part of the body using the same method. You can use tiny running stitches or a blanket stitch for a different look.
TIP: For a more playful and handmade look, try positioning the tail of your bunny off to one side. This small adjustment can add a touch of whimsy and personality to your finished ornament. You can also add a small pom-pom for the bunny's tail instead.
3. Next, attach the face and the paws to the front part of the body using a matching thread and the same method you used for the previous step.
4. To embroider the bunny's face, start by using a simple satin stitch and two strands of pink embroidery floss for the noise. Then, add a straight stitch for the mouth. For the eyes, use a colonial knot stitch and two strands of dark brown embroidery floss. Finally, add the whiskers using long straight stitches and only one strand of embroidery floss.
5. Let's sew the feet. Using the same method and thread as before, attach the inner feet on top of the feet. Then, sandwich one foot piece with a piece with the inner foot attached and stitch them together using the same method as before, such as running stitches or blanket stitches.
6. Now it's time to sew the bunny together! Place the back bunny shape wrong side up, then top it with the bunny's front side facing right side up. Sandwich a small ribbon on the head between the two pieces. Stitch around the edges of the bunny using the same method and matching thread as before, leaving a small gap on the bottom for staffing.
NOTE: I did not add a ribbon to this bunny.
7. Stuff and finish the ornament. Stuff your bunny ornament with soft fill or other stuffing material through the gap you left open. Make sure to push the soft fill gently inside the ears. Once it's full, sew up the gap using the same stitch you used to sew the rest of the bunny.
8. Finally, attach the feet to the bottom part of the body with small hidden stitched.
And there you have it - a cute and festive felt bunny ornament that is perfect for Easter! You can make multiple ornaments in different colours and sizes to create a fun and whimsical display. Happy crafting!
You can watch a video tutorial for this softie on my YouTube channel here.
Please use the #stitchingnotes and #stitchingnotespattern hashtags if you would like to share your bunny on Instagram with me.
Larisa xo


Where do I get the pattern pieces for the shapes of the Bunny?
ReplyDeleteVery cute! Cheers Meredithe
ReplyDeletesuperb
ReplyDeleteI love how easy it sounds like that would be such fun project.
ReplyDeleteIt is an easy project and working with wool felt is always fun and pleasure.
Delete